Paint protection film offers consumers so many opportunities to protect their valuable property that its uses can only be limited by ones imagination. All you need is a smooth surface like that of your cell phone or your laptop. We have had people protect furniture, counter tops, medical equipment, and brass hand rails. A whole new industry has started with companies using our ClearMask Films to create kits for consumer electronics products such as i-pods, I-phones and other valuable possessions. This Blog will show you how relatively easy it is to create your own pattern using our AeroGard film from 3M's Aerospace division. These simple techniques can be used on almost anything you want to protect that is not to large, complicated, or possessing severe compounded curves or cutouts.
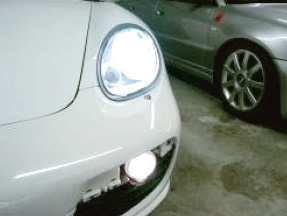
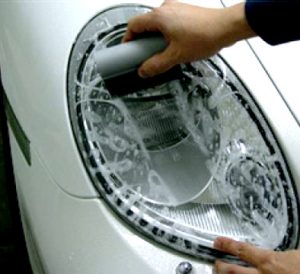
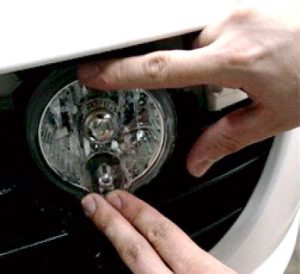
We will demonstrate self patterning using a Porsche headlight.The first thing you will want to do is prepare a clean work surface that you can cut on. A clean shop table is fine.
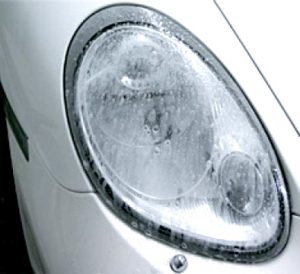
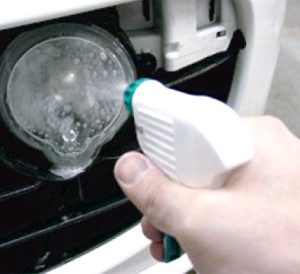
Clean the surface of the part (headlight) you are patterning well. We suggest a solution of approximately 1/2 to 1 teaspoon of common dish washing soap to a quart (32 oz.) of water in a spray bottle.
After cleaning the part you are patterning, spray a mist of the cleaning solution on the part and place a rough cut piece of film (approximate size) on the wet part surface with the adhesive release liner facing the part (down) and the clear urethane facing up. The wet surface will help hold the film in place creating a capillary action between the thin film and the part. NOTE: Be careful with liquids around electronics.
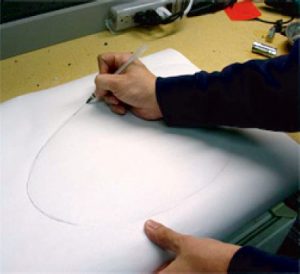
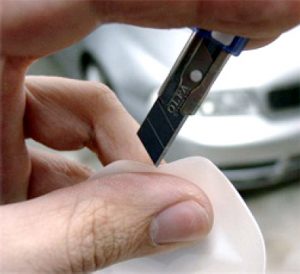
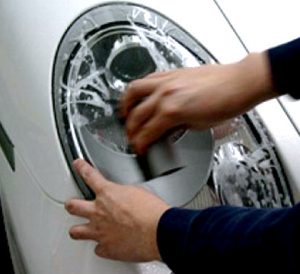
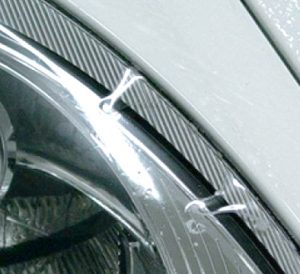
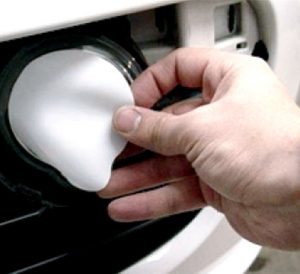
Use a fingernail to trace an outline around the part making sure not to move the film from its position. Press hard with your fingernail and you will leave a temporary crease mark in the soft self healing urethane to help you see where to trace your pattern with a marker or pen.
Trace your part using a ball point pen, fine tip marker or grease pencil. Remember AeroGard is extremely flexible so when tracing it is better to trace the part short than long. You can always stretch the film but it is more difficult to cut, especially on the car.
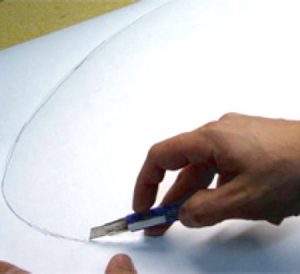
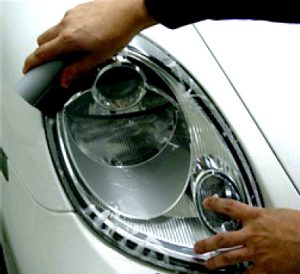
Now that the part is traced you can transfer the film to the cutting surface and cut it completely through using a sharp razor knife or scalpel. Tip: If you do not have a suitable cutting surface ordinary sharp scissors work well to cut the film in fact some professionals actually prefer scissors over knives.
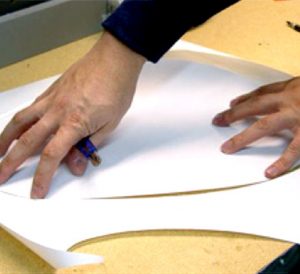
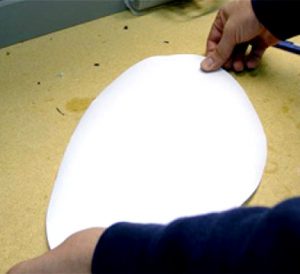
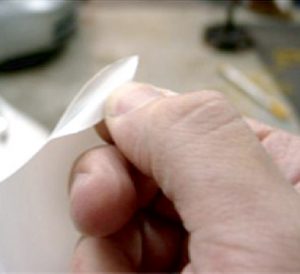
Inspect your cuts making sure you have cleanly cut edges. Dry test fit your design with the clear film facing you and make any adjustments as needed. Use release liner as a pattern in reverse for the opposite light.
NOTE: The above process can also be done using paper to create a dry pattern that can be transferred to the AeroGard film. We like the wet technique using AeroGard because this product is the only product in the industry that has a conformable adhesive release liner that can be worked with while wet. It is also the clearest non light distorting film in the industry.
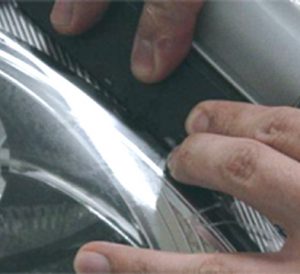
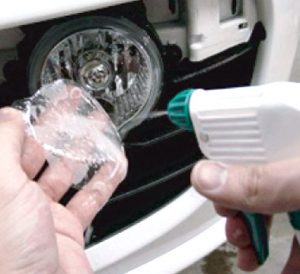
Place your knife blade or other very thin object (pin) between the film and the adhesive adhesive liner in order to separate the two parts. While pulling the two parts apart, spray application liquid between the parts being careful not to get fingerprints on a dry adhesive surface and spray liberally while removing liner completely .
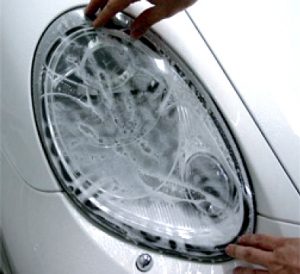
Spray the part surface liberally with the wetting solution prior to application. Place part adhesive side down onto the parts surface and align it by sliding into place. Spray liquid on outside surface of film so the squeegee will glide without prematurely gripping and sliding the film.
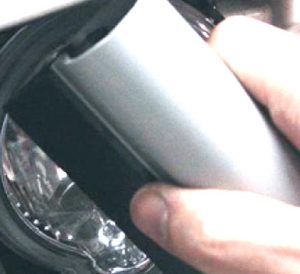
With the part in position, hold the film with one hand and start to squeegee the wetting solution from under the film. Your squeegee strokes should be from top to bottom and center out to prevent wetting solution from migrating back under your squeegeed film. If you have some compound curves in your part, don’t be afraid to squeegee one corner to tack film in place and with your free hand stretch some of the wrinkles out while squeegeeing.
When you have squeegeed the major amount of wetting solution for under the film you may have finger like bubbles that form and will not immediately lay down after squeegeeing. Do not panic, these bubbles form due to stress and excessive moisture still under the film. Spray a small amount of alcohol and water (25% alcohol 75% water) between the film and part to be covered. This simply promotes adhesion by rinsing the soap residue from under the film. Once the moisture has evaporated the film should adhere permanently.
Sometimes a little pressure from a warm finger holding the bubble down will aid also in initial adhesion.
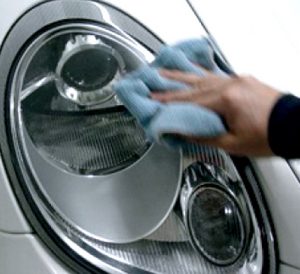
Use a micro fiber or soft paper towel to remove any over spray or liquid from the film edges. Making sure the film edges are sealed good is important for a clean application. Water bubbles that remain in the film after squeegeeing will all dry out clear over time. Any dry air bubbles can be removed by piercing with a pin from the side and squeezing the air out with finger pressure.
Now move onto any additional parts you may have designed.
You are almost done. After all the parts are installed it is important to go over your work making sure that no bubbles have popped up at the edges and all the edges are sealed down and adhered.
Good job you just saved a lot of money and have created protection for you valued possessions.
I have been browsing online more than 3 hours today,
yet I never found any interesting article like yours.
It is pretty worth enough for me. In my opinion, if all web owners and bloggers
made good content as you did, the web will be a lot more useful
than ever before.
 We will demonstrate self patterning using a Porsche headlight.The first thing you will want to do is prepare a clean work surface that you can cut on. A clean shop table is fine.

yet I never found any interesting article like yours.
It is pretty worth enough for me. In my opinion, if all web owners and bloggers
made good content as you did, the web will be a lot more useful
than ever before.